Table of Contents
Biome is a fast linter.
Bacon is a background code checker.
They're the perfect team to check, fix, and improve your JavaScript / TypeScript / CSS.
Here's how.
What you'll get
This setup displays Biome's diagnostics in a terminal window. You can either integrate this terminal into your IDE or run it side-by-side with your editor.
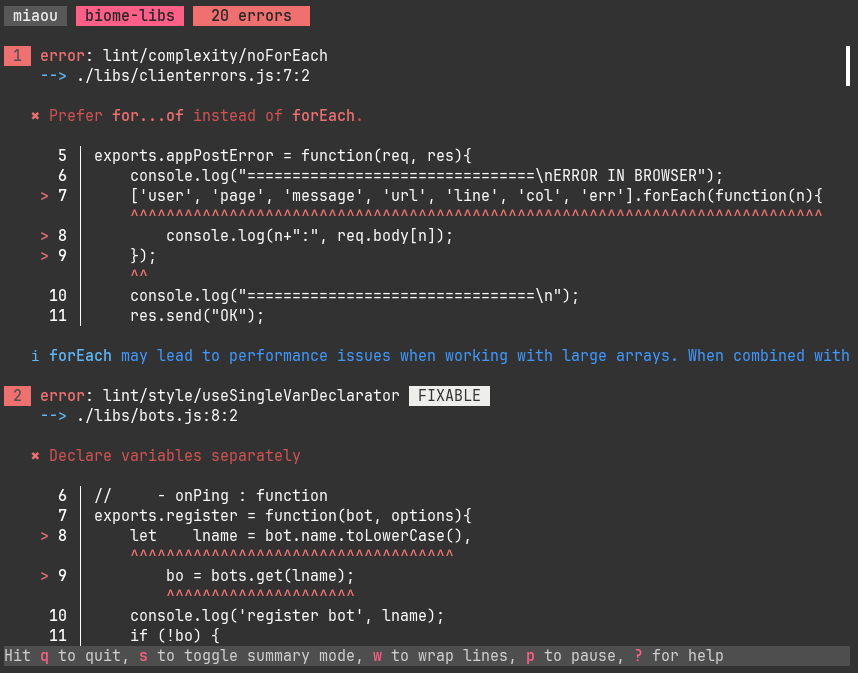
With a key shortcut in your IDE, you jump to the location of the error, fix the code, and see bacon update.
Bacon works in background, which means diagnostics are still displayed (with relevant features like searching, summarizing, etc.) while the next set of diagnostics is computed.
Bacon can be used with other linters, it's for example compatible with ESLint. And it perfectly deals with slow ones as you don't have to wait.
But you'll also appreciate a fast linter like biome, which ensures your changes are immediately visible in bacon even in a big project.
Install Bacon
First install the Rust environment, head on to https://rustup.rs/.
If you have an old rust installation, it's better to update it with rustup update.
Install bacon with
cargo install bacon --locked
Install and configure Biome
Biome installation may depend on your JS package manager (npm, yarn, etc.).
Copy the relevant install command from https://biomejs.dev/guides/getting-started/.
You'll need a project specific biome file.
It may be simple. For example, I use this one on one of my projects:
{
  "files": {
    "ignore": [
        "jquery-*.js",
        "prettify/*"
    ]
  }
}
Biome configuration doc: https://biomejs.dev/reference/configuration/
Add job(s) for Biome in bacon
Bacon jobs are usually configured in a bacon.toml file in your project.
If your project also uses some Rust you may need a richer file.
In such case, do bacon --init to create it.
I'll take here the example of a project with JS as main language both in backend and front:
default_job = "biome-back"

[jobs.biome-back]
env.RAYON_NUM_THREADS = "1" # for reproducible order
command = [
    "npx", "@biomejs/biome", "lint",
    "--colors", "force",
    "./libs",
    "--skip", "complexity/useArrowFunction",
]
need_stdout = true
analyzer = "biome"
watch = ["libs", "biome.json"]

[jobs.biome-front]
env.RAYON_NUM_THREADS = "1" # for reproducible order
command = [
    "npx", "@biomejs/biome", "lint",
    "--colors", "force",
    "./src",
    "--skip", "complexity/useArrowFunction",
    "--skip", "style/useTemplate",
    "--skip", "style/noArguments",
    "--skip", "style/useConst",
    "--skip", "complexity/noForEach",
    "--skip", "complexity/useLiteralKeys",
]
need_stdout = true
analyzer = "biome"
watch = ["src", "biome.json"]

[keybindings]
b = "job:biome-back"
f = "job:biome-front"
This file defines two jobs,biome-back and biome-front.
Interesting to notice:
env.RAYON_NUM_THREADS = "1": ensures a consistent order of diagnostics"npx", "@biomejs/biome", "lint": specifies how biome is launched, may be different for your setup"--colors", "force": because bacon need TTY information to analyze diagnosticsanalyzer = "biome": tells bacon how to analyze the command output. If you don't use biome but eg ESLint, other analyzers are available
The command contains the directory to analyze (eg "./libs").
The same directory is also present in the watch part which tells bacon what to watch for changes.
You'll have to change this directory for your project.
As you see, the job definitions make some rules skipped. If you change the bacon.toml file (or the biome.json one) while editing, because you don't want some rule to be applied, you don't have to quit and relaunch bacon, it automatically updates on configuration changes.
When launched with just bacon, bacon runs the biome-back jobs by default.
But I can switch task with either the f or b key thanks to the keybindings defined at end.
Hook it to your IDE
neovim
With nvim-bacon a hit on a key lets you go to the next point needing attention in your code.
And a hit on another one shows you the whole list of problem locations.
LSP
For other editors, the best choice to get such integration today is to use bacon-ls.
Further Resources
While bacon usage is quite straightforward, with main shortcuts are displayed at the bottom, and while you may very well go with just what's described here, it's also packed with many other features that you may want to see at some point. For that, have a look at https://dystroy.org/bacon.
Biome too, is more than what appears there. To start with, it's not just a linter. And even as a linter, it takes configuration for your precise needs. Read about it at https://biomejs.dev/.